
If you are a Blogger, Youtuber, or app developer, or have a Facebook or Instagram page, and want to make money from affiliate marketing, then this blog is for you. Here, I will explain a step-by-step guide to starting Amazon Affiliate Marketing. Affiliate Marketing doesn’t require any investment, but you can earn much money from that. So, let’s begin.
Step – 1: Create an Amazon Account
First, you must create an Amazon account to start an Amazon affiliate. If you already have an Amazon account, you can use that also. But if you want to create a fresh new account for the affiliate purpose, you can also do that. After creating an account on Amazon, you have to open https://www.amazon.in/ on your device and scroll it down.
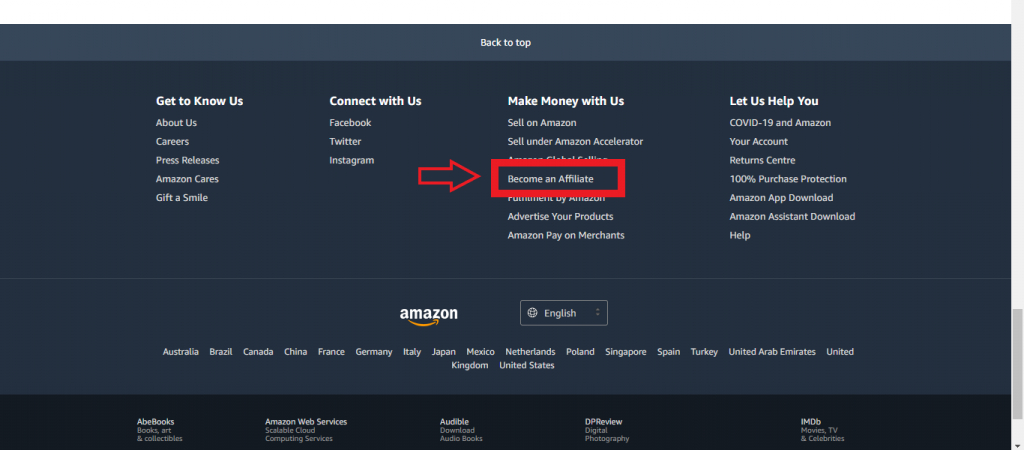
At the bottom of the page, you find a section on Make Money with Us. In this section, you have to click on Become an Affiliate.
Step – 2: Create your Amazon Associate Account
After clicking on Become an Affiliate you will be redirected to the new page where you have to click on Join Now for Free option, and then the new page of creating an affiliate account will open. Now you have to complete all four steps for creating an account.
a) Account Information– The first step is account information. It asks for the Payee’s Name, address, City, etc., and the marketer’s details. If you are an existing user, it will automatically fill in all account details. But if you are a new user and don’t have an Amazon account, you must fill that out yourself. In my case, I am the existing user, so my details were filled in automatically.
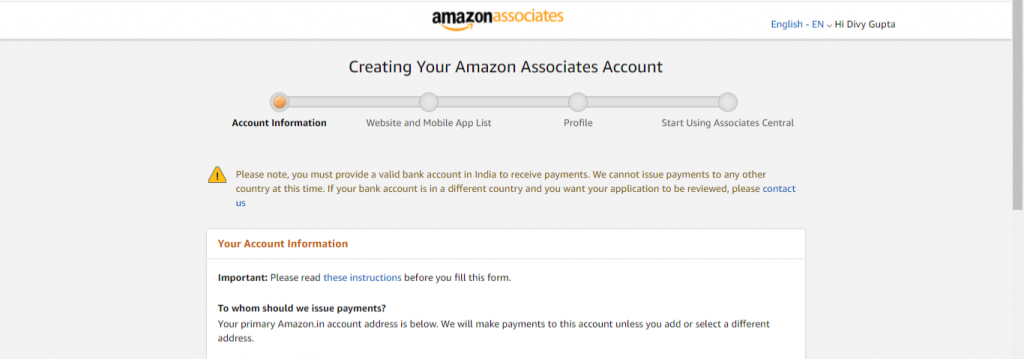
Now, in the first radio box option, you have to click on The payee listed above. In the second radio box option, you have to fill that in according to your citizenship. If you are a U.S. person, then click Yes, and if not, then click No. I am not a U.S. person, so I clicked No as shown below, and clicked Next to move ahead.

b) Website and Mobile App list– After clicking on next, you will switch to the second step which is the Website and Mobile App list. In this step, you have to enter your website in the asked section. You have to insert your website or blog in that section as it is necessary. If you don’t have a website, you can also add your YouTube channel link, Facebook page link, or Instagram page link. Also, if you have a mobile app, you can add that link to the Mobile App URLs section.
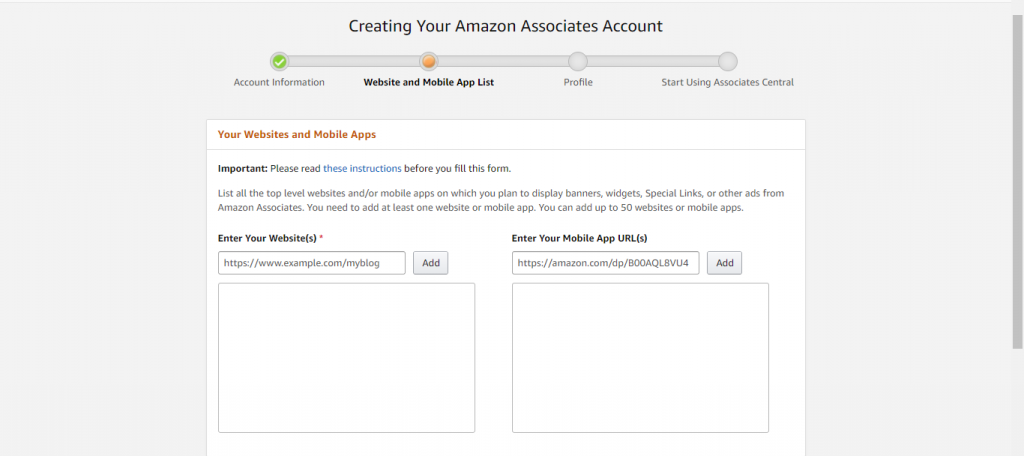
In my case, I have a website, so I insert that. After inserting the desired link, you have to click on add. If you have many websites or URLs, then you can add them too by just clicking add. Now click on next to move ahead.
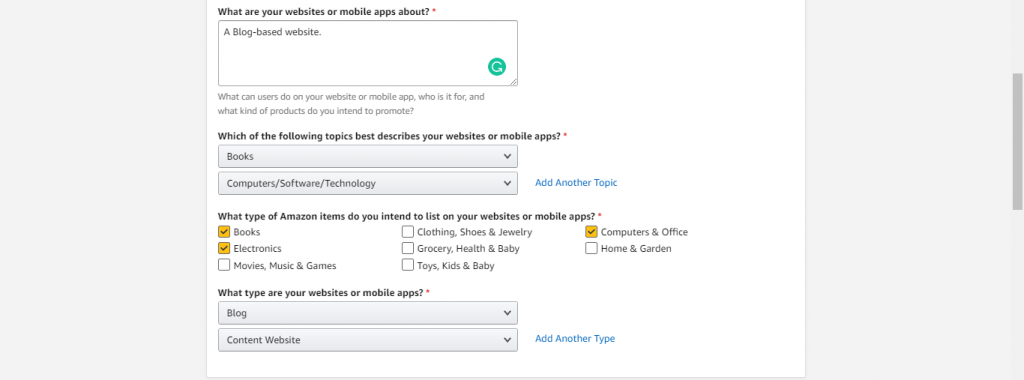
c) Profile– Now in the next step, you will come to the Profile page. This step is very crucial for creating an account. In the section of preferred associates store ID, you have to insert your name or as a user name. In the next section, all the URLs that you have added before will show. After that, you have to give the description of your inserted URL and then move ahead.
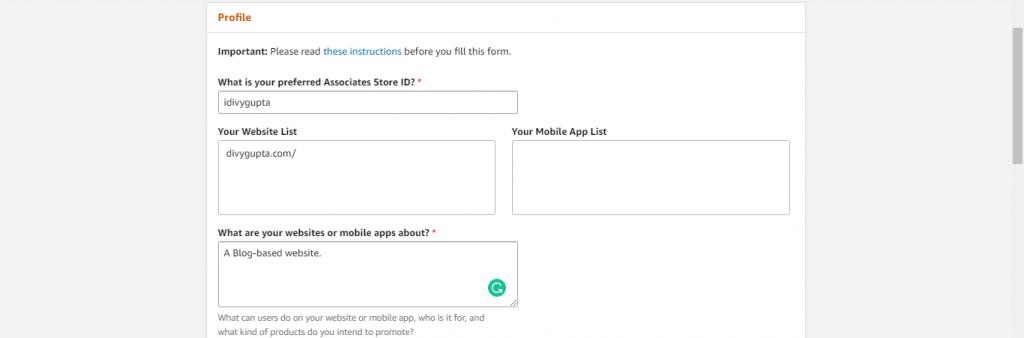
Now you have to select the topic that describes your website or mobile app. According to your need, you have to choose the topic or fill the same as I do. Then you have to click the items that you have to show on your website according to your need. Also, you can change your Amazon items later, so don’t worry. After that, you have to select the type of your website according to your URL.
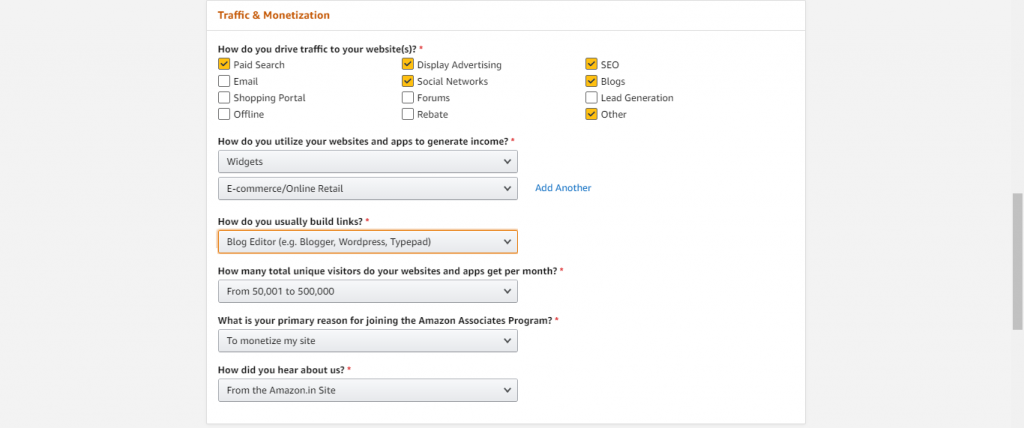
In the ‘Traffic and Monetization section’ click on your various traffic resources and move further. After that, you have to fill generated income utilization and link builder section according to your URL with visitors, the primary reason, and hear sections. Also, you can complete all these sections as I have done. Then you have to complete the captcha and click on Contract Terms. Click on Finish.
d) Start Using Associates Central– After clicking on Finish, you will get a message of Congrats where your unique ID is available as you inserted before. Now in the section of Payment and Tax information, you can fill it later. It will ask for your banking details and so on.
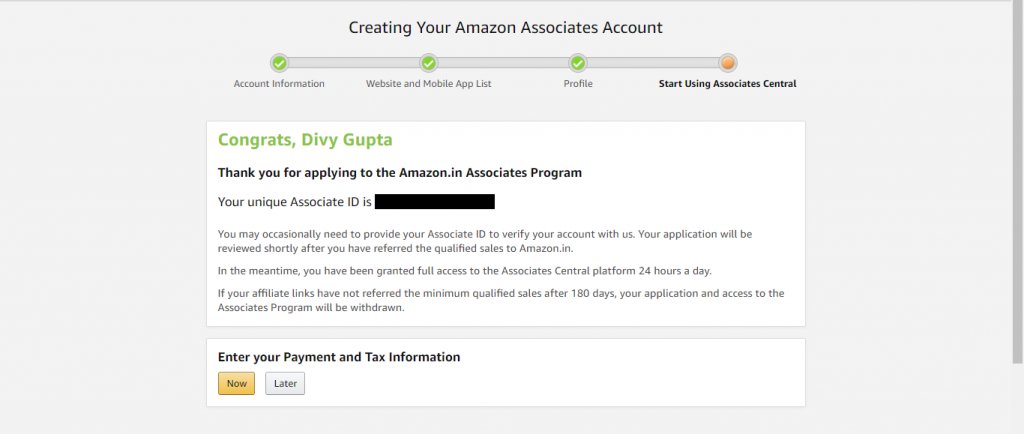
You can’t retrieve money before completing the target of Rs 1K. So it should be good to add banking details at that time. After clicking on the Later option, you will get a verification mail. After coming back to the Amazon page, you see at the top that your Amazon affiliate account is ready to use. Sometimes they take up to 24 hours for verification, so don’t panic. Just wait for the verification mail.
Step-3: How to make an affiliate link to the product
From all the above steps, you can easily create an Amazon affiliate account. Now the main thing is how can we make an affiliate link to the product?
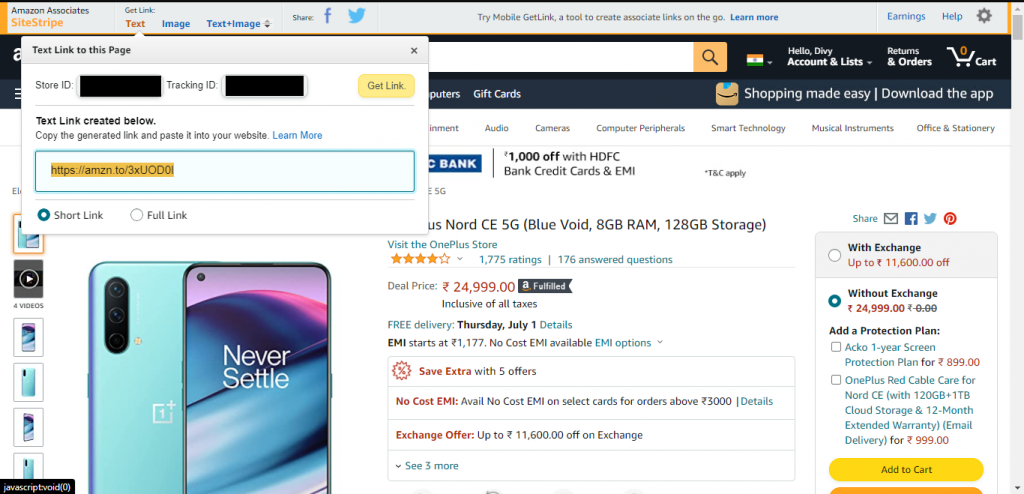
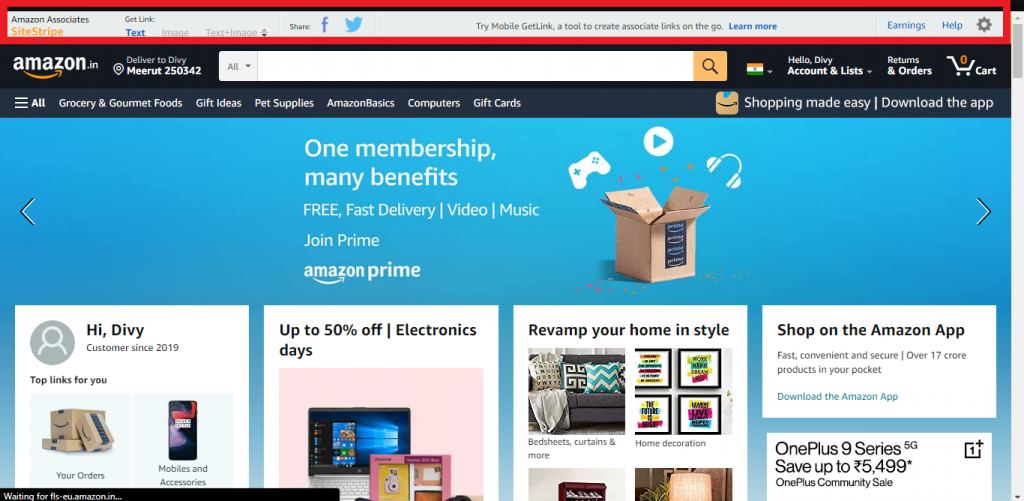
To make an affiliate link to the product, you have to search the product name or home screen available product, then click on that. After that, that product will be open, and then you have to click on the text option as shown above. Then you see that there will be a short link to that product which is an affiliate link of that product. After getting the affiliate link of that product, you can now share that link on your website, blog, pages, social media, etc., to get visitors.
If someone clicks on that link to buy that product, then it redirects the buyer to Amazon. If the buyer buys that product or any product from Amazon for up to 24 hours, you will get your commission.
That’s how you can start your Amazon affiliate marketing and make money from that. As I also told you earlier, you can’t make huge money in a single day. Everything requires time. If you give some time towards this then yes you can earn a lot of money from this. So be patient and start Amazon affiliate marketing today.


